We’ve been writing libraries for Spark at Uncharted for several years, and continuous integration involving the Spark runtime has always been a difficult thing to accomplish. Common approaches, such as creating a Spark context within a standard Scala runtime, can fail to accurately emulate nuances of the distributed Spark environment. I’d like to share a solution we’ve developed for creating a native Spark test environment within TravisCI.
Why is it so hard to test Spark Apps?
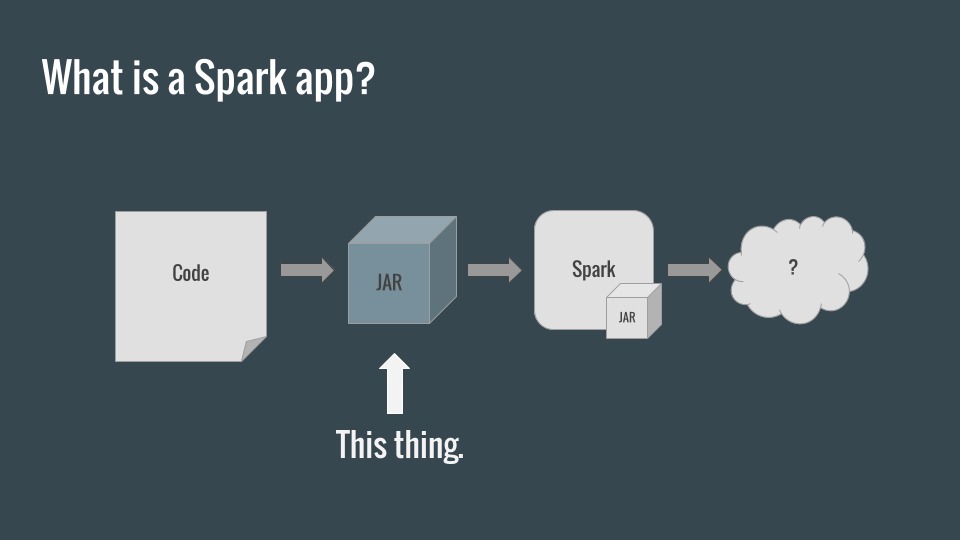
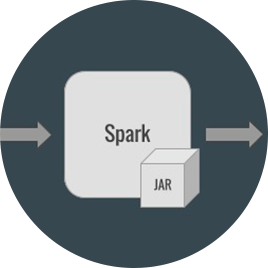
At its core, a Spark application is just a Java Archive, which is submitted to a Spark Cluster (runtime), where it runs in a distributed fashion.
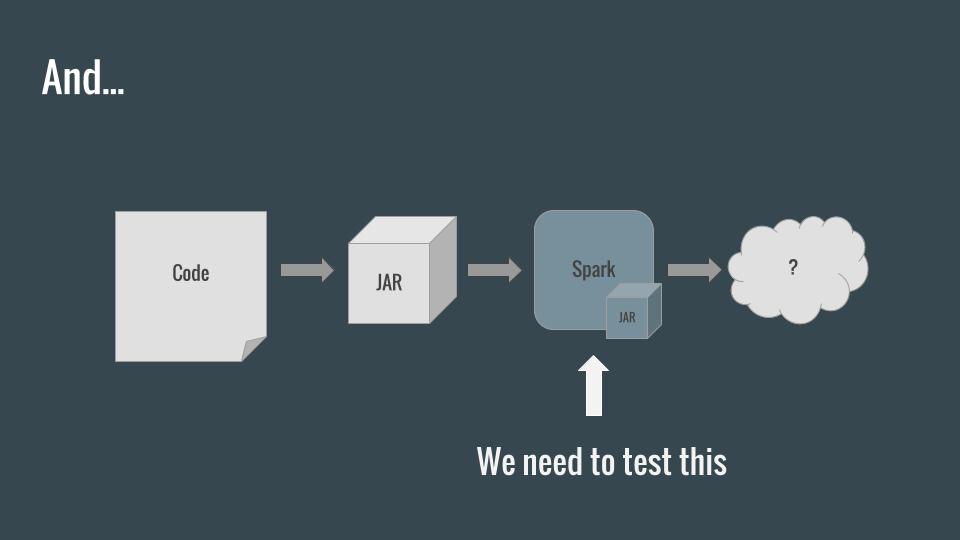
What we really need to do is to test our app inside the Spark environment to guarantee that every single line of code works as intended with a specific version of Spark (or multiple versions of Spark).
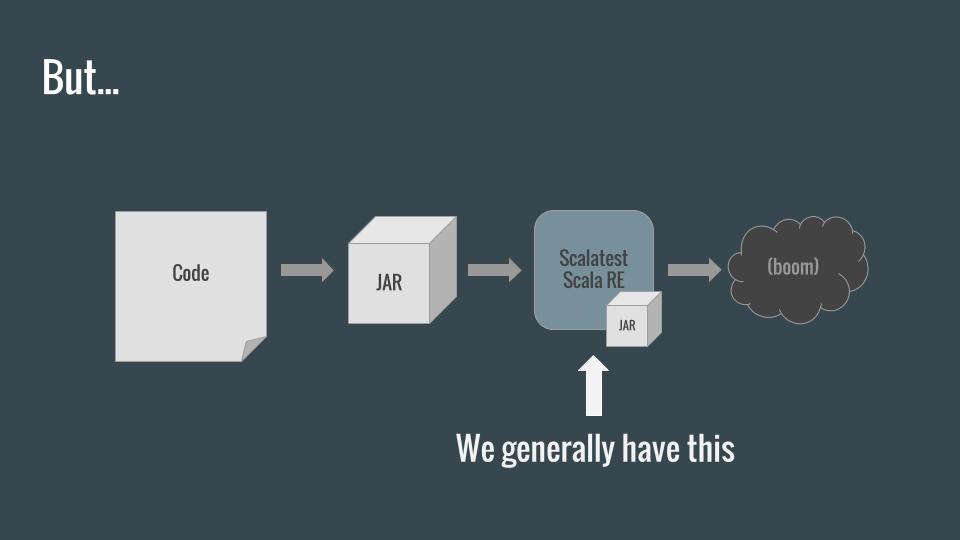
Unfortunately, unit testing frameworks like ScalaTest spin up their own Scala runtime environment (JVM) and test the code there instead of inside Spark. This means that, with this approach, we can only test code which doesn’t take advantage of the Spark libraries, since we don’t have a SparkContext.
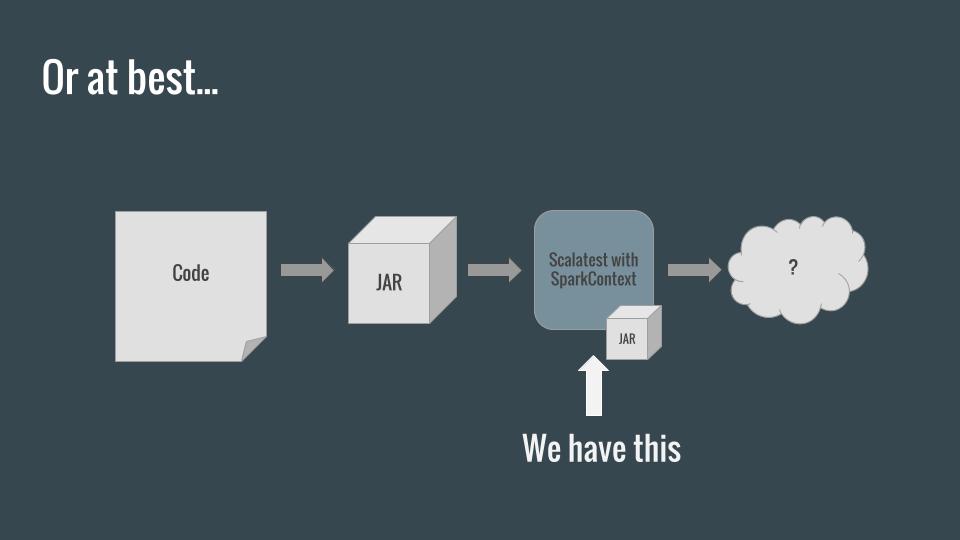
The Spark project tests Spark itself by creating a SparkContext inside ScalaTest’s runtime. This is equivalent to spinning up a single node, standalone Spark cluster which will share a JVM with the tests. This works pretty well, but falls short in a few ways:
- Code which doesn’t use a
SparkContextisn’t really being tested “in Spark” - Code which does use a
SparkContextwon’t necessarily be tested fully/properly without careful, manualRDDrepartitioning within your tests. The single node cluster will automatically create one partition forRDDs, and thus code using such functionality asaccumulatorsorcombineByKeywon’t be tested thoroughly due to a lack of merges. - We generally don’t want to rely on the assumption that Spark inside Scala works the same way as Scala inside Spark. We’d rather treat Spark as a black box service.
A test application
Let’s start by turning our tests into a Spark application so that we can run them inside Spark.
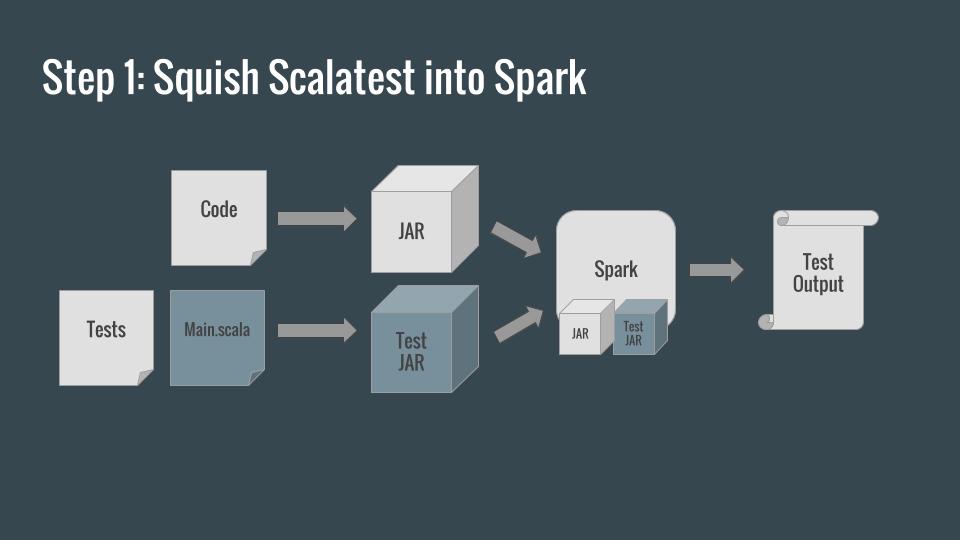
Start by modifying your build to produce a test JAR as well as a distribution JAR. This one will include all of our tests, as well as a special Main class which will kick off those tests.
Main.scala
package my.company.project

import org.scalatest.tools.Runner

object Main {
  def main(args: Array[String]): Unit = {
    val testResult = Runner.run(Array("-o", "-R", "build/classes/test"))
    if (!testResult) {
      System.exit(1) // exit with an error code if a test failed
    }
  }
}
Main is a simple Scala object, executing the tests in build/classes/test, producing the expected test output on stdout and stderr (via the -o flag), and exiting with the appropriate exit code at the conclusion of the suite. When used as the main class of the test jar, it turns your suite into a Spark application which can be submitted to Spark.
A containerized test environment
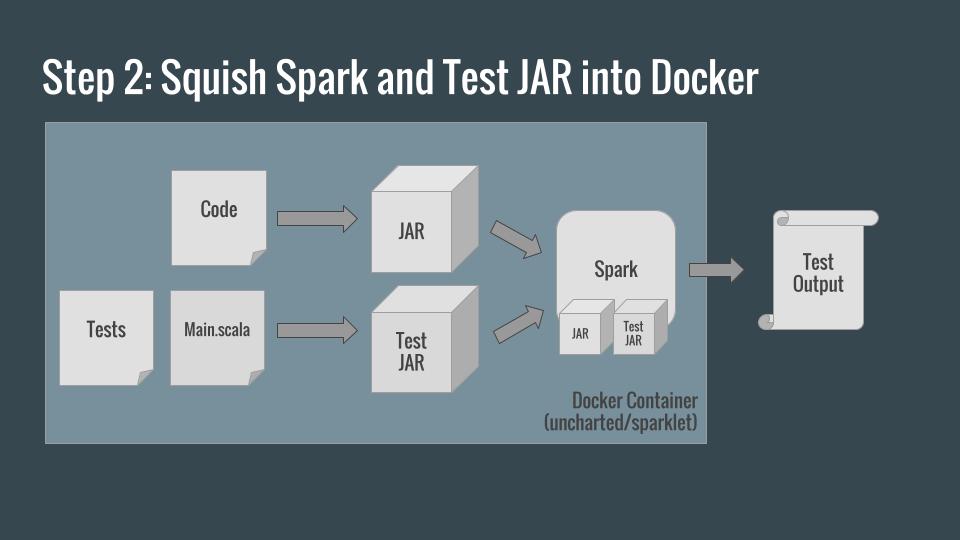
To use our Test Application, we still need a Spark cluster. Docker provides a convenient way to create such a cluster either on a development machine or within a continuous integration system.
We can build our code inside the container, spark-submit it and have the output and exit code of the container be the output and exit code of the Test Application (and build process).
To facilitate this across multiple projects, we’ve open-sourced uncharted/sparklet. You can pull this image, mount your code within it as a volume, and submit your test JAR to the cluster. Since docker run commands can often look a little complex, we include a shell script in the repository which spins up an interactive test shell where a developer can run ./gradlew as they modify code.
test-environment.sh
#!/bin/sh
docker run \
# the Gradle daemon speeds things up
-e GRADLE_OPTS="-Dorg.gradle.daemon=true" \
# This log4j.properties file silences a bunch of ugly output from Spark
-v $(pwd)/src/test/resources/log4j.properties:/usr/local/spark/conf/log4j.properties \
# mount your codebase as a volume within the container.
-v $(pwd):/opt/mycodebase \
# interactive mode
-it \
# set our working directory to the location of our code
--workdir="/opt/mycodebase" \
# fire up the spark container with a shell (bash)
uncharted/sparklet:1.5.2 bash
build.gradle (excerpt)
We also wrap up spark-submit as an exec task within build.gradle so that Gradle can kick off the entire process with one command. Notice that this task depends on the generation of our distribution and test JARs, and that it overwrites the default Gradle test task (since we have no use for that one).
// create an Exec task to test code via spark-submit
task test(overwrite: true, type: Exec, dependsOn: [jar, testJar]) {
  executable = 'spark-submit'
  args = [
    //the --packages flag allows us to place our dependencies on the path
    "--packages","org.scalatest:scalatest_${scalaBinaryVersion}:2.2.5",
    //the --jars flag allows us to place our code on the path
    "--jars","/opt/${repoName}/build/libs/${artifactName}-${version}.jar",
    "--class","my.company.project.Main",
    "build/libs/${artifactName}-${version}-tests.jar"
  ]
}
At this point:
- We can run
$ ./test-environment.shto start a Spark container - At the prompt type
$ ./gradlewto build our code and run our tests
This greatly simplifies the development process, since developers no longer have to install and configure a JRE, Spark or any other dependency. Instead, they simply need Docker and a text editor to write code. Everything else happens inside the test container. We also have the added advantage that everyone on our team will see the same test output as our continuous integration system will.
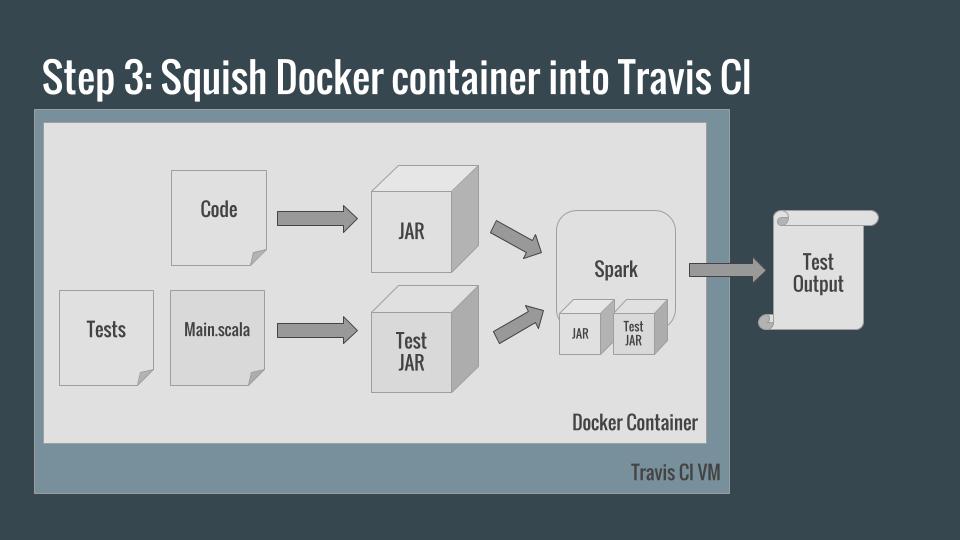
Continuous Integration
What we’ve done thus far is translate our problem of testing a Spark application into the problem of testing a Docker container. Fortunately, TravisCI supports Docker!
All we need to make Travis run our tests after each commit is a .travis.yml file:
.travis.yml
sudo: required

language: bash

services:
  - docker

before_script:
  # generate environment file so we can give the travis environment to our test container
  - env | grep TRAVIS_ > travis.env
  - echo "GRADLE_OPTS=-Dorg.gradle.daemon=false" >> travis.env
  - echo "CI_NAME=travis_ci" >> travis.env
  - echo "CI=true" >> travis.env
  - echo "TRAVIS=true" >> travis.env
  - echo "CONTINUOUS_INTEGRATION=true" >> travis.env
  - echo "DEBIAN_FRONTEND=noninteractive" >> travis.env
  - echo "HAS_JOSH_K_SEAL_OF_APPROVAL" >> travis.env

script:
  # run test container
  - docker run --env-file travis.env -v $(pwd)/src/test/resources/log4j.properties:/usr/local/spark/conf/log4j.properties -v $(pwd):/opt/salt --rm --entrypoint=/startup.sh --workdir="/opt/salt" uncharted/sparklet:1.5.1 ./gradlew test
The before_script section extracts the Travis environment into a travis.env file, allowing us to pass vital information into our test container, such as which feature branch we’re on. These environment variables are critical for the proper functioning of certain Gradle plugins, such as coveralls-gradle-plugin (for submitting code coverage reports to Coveralls).
The script section is a tad long, but is equivalent to the contents of test-environment.sh, running ./gradlew test instead of an interactive bash shell. This means that the container will build the code, run the test suite and exit with the exit code of ./gradlew test, thus providing Travis with the information it needs to know whether or not our build is successful.
That’s all, folks!

For a working example of this approach, check out SALT. SALT’s build also measures code coverage and is connected to Coveralls, if you’re interested in doing something a little more fancy.